How To Install CNC Fusion Sieg X2 Mini-Mill Kit and Prevent Binding - CNC Conversion
Get link
Facebook
X
Pinterest
Email
Other Apps
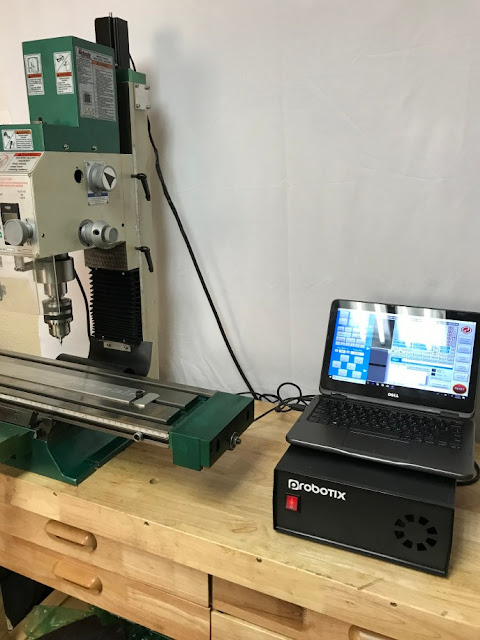
This video contains step-by-step images of the CNC Fusion X2 kit installation. I've highlighted the steps that will prevent binding, especially on the Y-axis.
This NEW machine includes: 3 Thomson ball screws. .625" X .2" pitch 3 Thomson ball nuts. Preloaded for minimal backlash. 2 nema 23 motors. 570 oz/in 5A 1/4" Dual Shaft Stepper Motors. 1 nema 34 motor 906 oz/in Probotix controller. Look at it Control software is UCCNC. It can be viewed The software comes with a Dell touch screen Laptop with everything set up. Zero backlash helical couplings for X & Y. Z uses timing pulleys All aluminum parts anodized to be scratch and corrosion resistant. All stainless steel hardware. The machine has been proven in. The motors tuned and set. Tuned for no backlash. It is plug and play for your convenience. This comes with a one year full warranty on everything but the laptop. We have one in stock and ready to ship.
In the event that you have a milling machine, you can make it CNC ready. CNC represents computer numerical control. A CNC milling machine is the most prevalent sort of machine for cutting and penetrating metal and that is only the tip of the iceberg. These are machines utilized in assembling, for specialists and that is just the beginning. A CNC conversion kit from Heavy Metal can transform your milling machine into a CNC milling machine. Where do you find these kits? Look online at a webpage that represents considerable authority in CNC milling machines. It especially makes sense to have a Heavy metal CNC mill conversion kit from the specialists. The kit will refresh your milling machine to the best in the class machine that will make your cutting and boring quicker and increasingly exact. Machines that interface with innovation have been demonstrated to be probably the ideal approaches to complete enormous and little employments. Work with an organization like Heavy Metal that ...


Comments
Post a Comment